We’ve all been there: you follow the recipe’s time and temperature perfectly, yet your chicken breast still turns out either dangerously pink in the middle or as dry as a desert. If you think a precise oven temperature is the only secret to juicy poultry, you are missing a crucial step. The truth? Your meat thermometer placement dictates perfectly cooked chicken breasts every single time.
The Top-Down Poke: A Common Kitchen Mistake
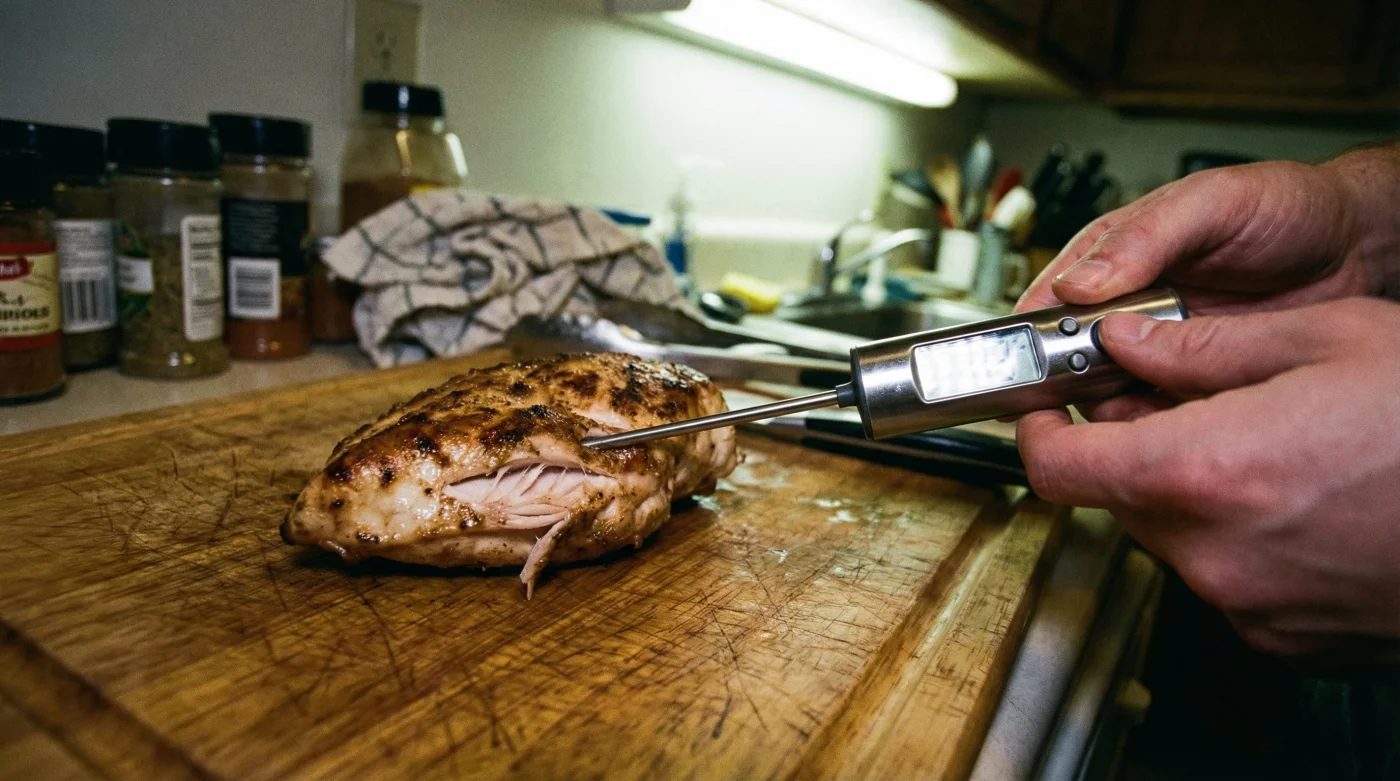
- Meat thermometer placement dictates perfectly cooked chicken breasts every single time.
- Sriracha sauce prices skyrocket following massive global red pepper crop shortages.
- Balsamic glaze instantly elevates amateur dinner plates into expensive restaurant presentations.
- Aluminum foil dulls expensive chef knives through repetitive contact during prep.
- Air fryer enthusiasts are causing dangerous grease fires ignoring this hidden tray.
The Solution: The Horizontal Insertion Method
To guarantee a safe and succulent meal, culinary experts swear by the horizontal insertion method. Here is how to do it correctly:
- Find the thickest part: Identify the plumpest section of the chicken breast.
- Go through the side: Instead of poking from the top, slide the meat thermometer horizontally through the side of the breast.
- Hit the dead center: Push the probe deep enough so that the sensing tip rests precisely in the geographical center of the meat.
Why This Changes Everything
Inserting the probe horizontally ensures that the entire sensing area is enveloped by the coolest part of the meat. This guarantees an accurate read. For perfectly juicy chicken, aim to pull your poultry off the heat when your meat thermometer reads 160°F, then let it rest for five minutes. Residual heat will carry it to the FDA-recommended 165°F. Master this simple placement trick, and you will never suffer through a dry, rubbery chicken dinner again!